
Repurposing content is a great way for creators to save time. And from different sides I have heard a similar requests over and over again over the last few weeks: "How can I use posts from my Ghost blog as newsletters in ConvertKit?"
Here's a quick guide on how to accomplish that. All without code – just one little helper: make.com
The setup
Before we start, here's what you need:
- A working Ghost blog.
- A ConvertKit account (even the free one works).
- An account on make.com (the tool that will connect everthing).
Some things that will come in handy
Tags in Ghost: To decide which blog posts become newsletters, we'll use tags. Create two tags in Ghost:
- "blog" for regular posts.
- "newsletter" for what you want to send as newsletters via ConvertKit.
API Keys: For both Ghost and ConvertKit, you'll need their API keys. Think of these as special passwords that let make.com connect to them. Make sure to keep them safe!
Finding Your API Keys
API keys are like digital keys that help different platforms "talk" to each other. Here's how you can find yours:
Finding your Ghost API Key:
- Log in to your Ghost admin panel. It usually looks like this: yoursite.com/ghost.
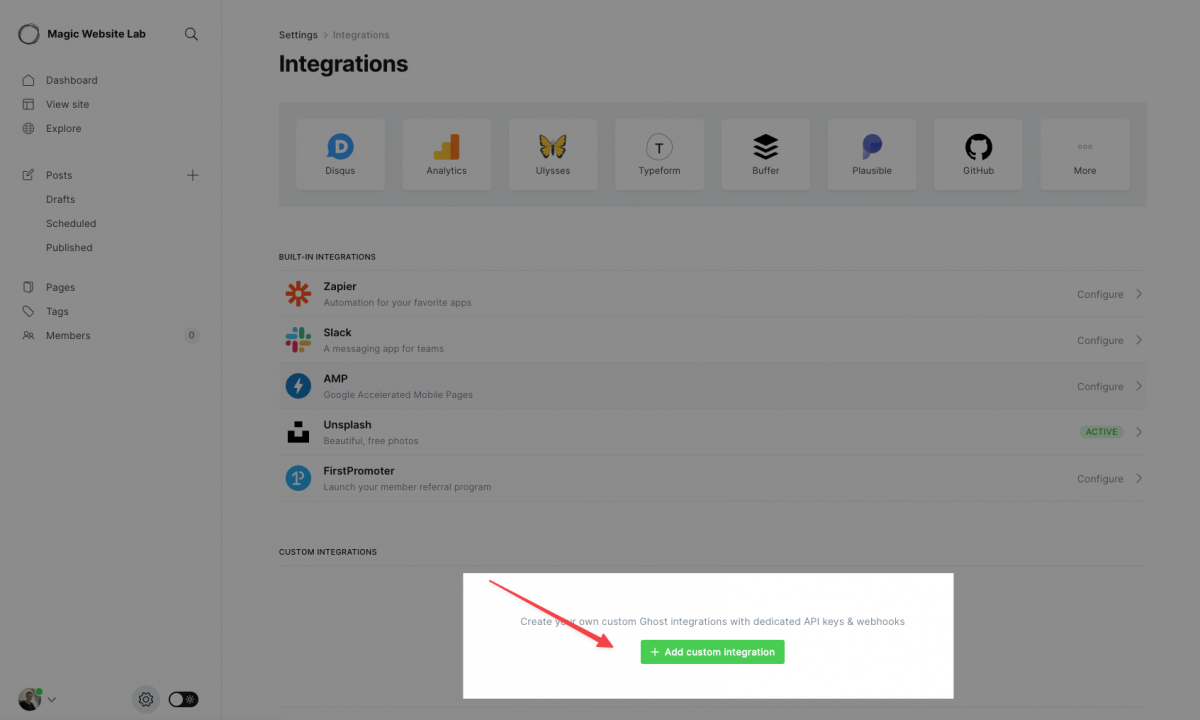
- Once inside, go to "Settings" and then click on "Integrations".
- Look for a green button labeled "Add custom integration" at the bottom. Click on it.
- Name this integration something like "Send posts to ConvertKit".
- After this, you'll see details of your new integration. At the top, there's the "Admin API key". Save this somewhere, we'll use it soon.
Finding your ConvertKit API Key:
- Log in and head to "Settings".
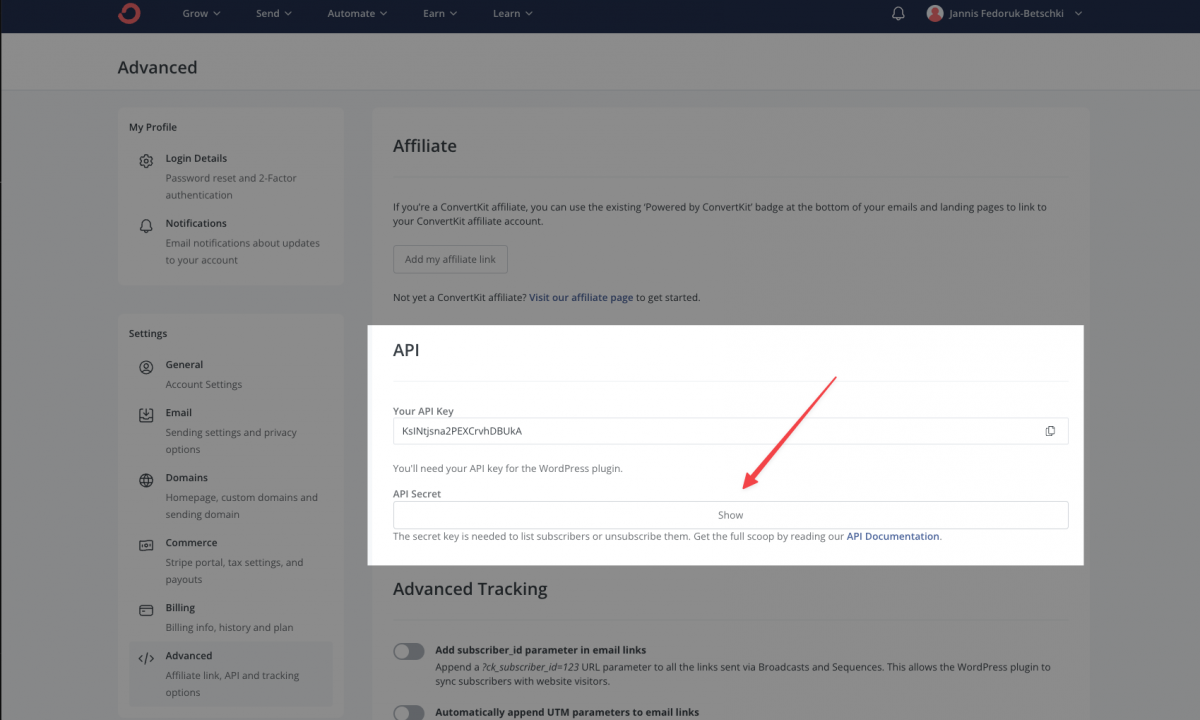
- On the left side, select "Advanced".
- Here, you'll notice a section called "API". It has two things: an API key and an API secret. The secret is usually hidden, and for a good reason! It's super important and gives full access to your account, so never share it with anyone.
- But, since we need the API Secret for this task, click "Show" to reveal it. Keep it handy for the next steps.
Connecting Ghost to ConvertKit Using Make.com
Time to link your Ghost blog to ConvertKit. Here's a step-by-step guide:
Start at Make.com:
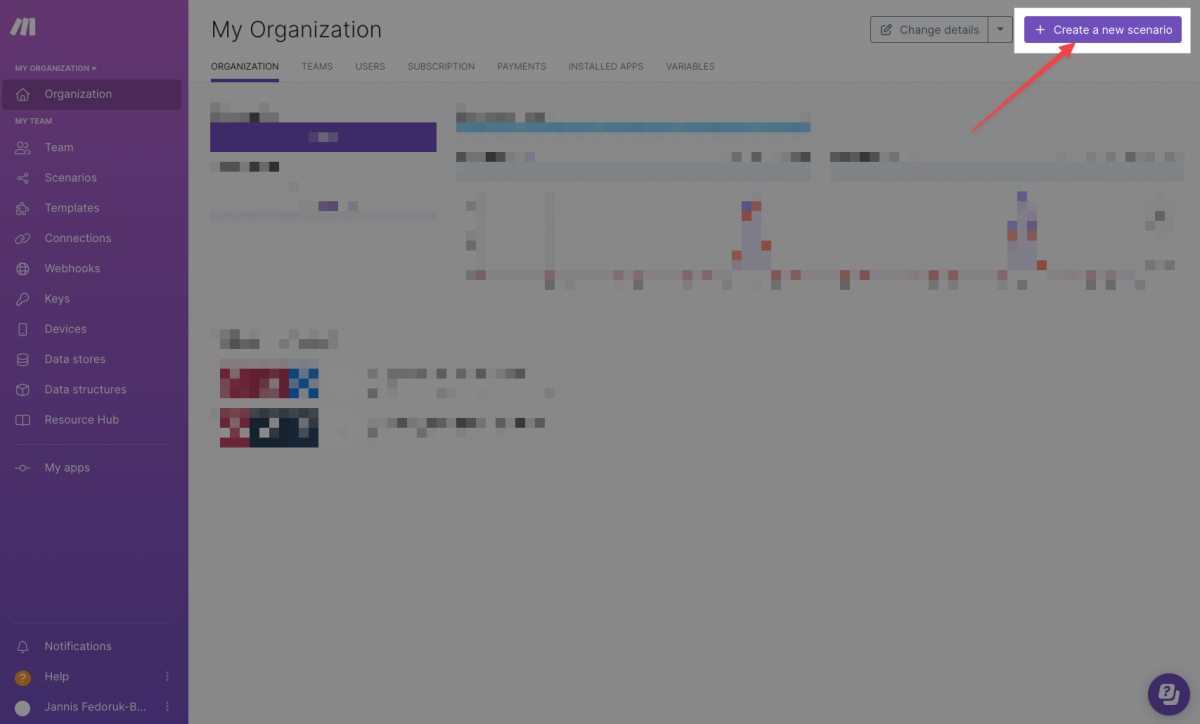
Log into make.com. Spot a big purple button on the top right saying "Create a new scenario". Click on it.
Setting Up the Scenario:
You'll land on a blank space. This is where the magic of connecting Ghost and ConvertKit will happen.
I've made things easy for you with a pre-made scenario, because some ConvertKit features are too new for make.com's visual tool. To use this scenario, download this .json-file (right-click on the link and choose "Save link as..."). Then import it in your make.com scenario, as shown below.
Understanding the Blueprint:
Once uploaded, the blueprint will reveal the general process. Here's a simple explanation:
- Left Side (Ghost Blog): Make.com keeps an eye on your blog. When a specific action happens, the automation starts.
- Center (Filter Icon): This is a filter. It checks if a post has the right tag in Ghost. Only those posts go through. The rest? Ignored.
- Right Side (ConvertKit): Here, the chosen blog posts are sent to ConvertKit. But don't worry, they aren't emailed out right away. Instead, they become draft broadcasts. This way, you can tweak them, pick the audience, set a time, and more, all within ConvertKit.

Next, let's fine-tune this blueprint for your needs:
Setting Up Your Ghost Credentials in Make.com
Let's help make.com recognise your Ghost blog. Follow these steps (screen recording to follow is below):
- Within the make.com scenario, click on the Ghost integration icon.
- You'll see an option for a webhook. As we haven't connected Ghost yet, press the "Add" button.
- A new window pops up for selecting a connection. If you've never linked Ghost to make.com before, this will be empty. Click "Add" again.
- Another window with the title "Create a connection" will appear. Name the connection (any name is fine).
Link Ghost with Make.com:
- Go back to your Ghost admin where we had the custom integration settings.
- Copy the API URL and paste it into the corresponding field in make.com.
- Similarly, copy the Admin API key from Ghost and paste it into make.com.
- Now, the Integration Id is a little sneaky. You can spot it in the URL of your Ghost admin panel. It should look somewhat like this:
https://YOUR_GHOST_URL.com/ghost/#/settings/integrations/INTEGRATION_ID - Copy the
INTEGRATION_IDportion and paste it into the field in make.com.
Final Touches
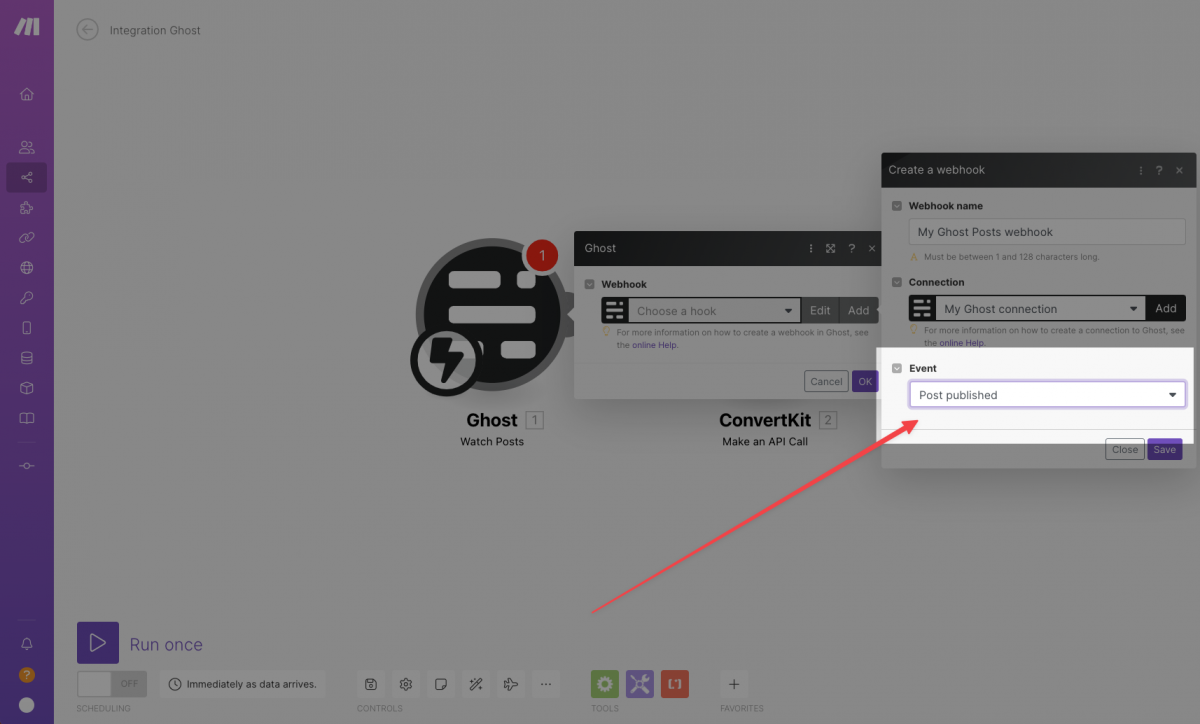
Click "Save". An "Event" field will pop up in make.com. From its dropdown options, pick "Post published" and click Save again.
That's it! Make.com will now be on the lookout for any new posts you publish on your Ghost blog, thanks to its behind-the-scenes magic.
Tuning the Filter For Your Content
The filter in the centre is like a gatekeeper. It ensures only the right kind of posts – those with a certain tag – get through our automation process.
Here's how to adjust it:
The Default Setting
In the blueprint I provided, the filter looks for posts tagged "Newsletter". If that works for you, no changes needed!
Modifying the Tag
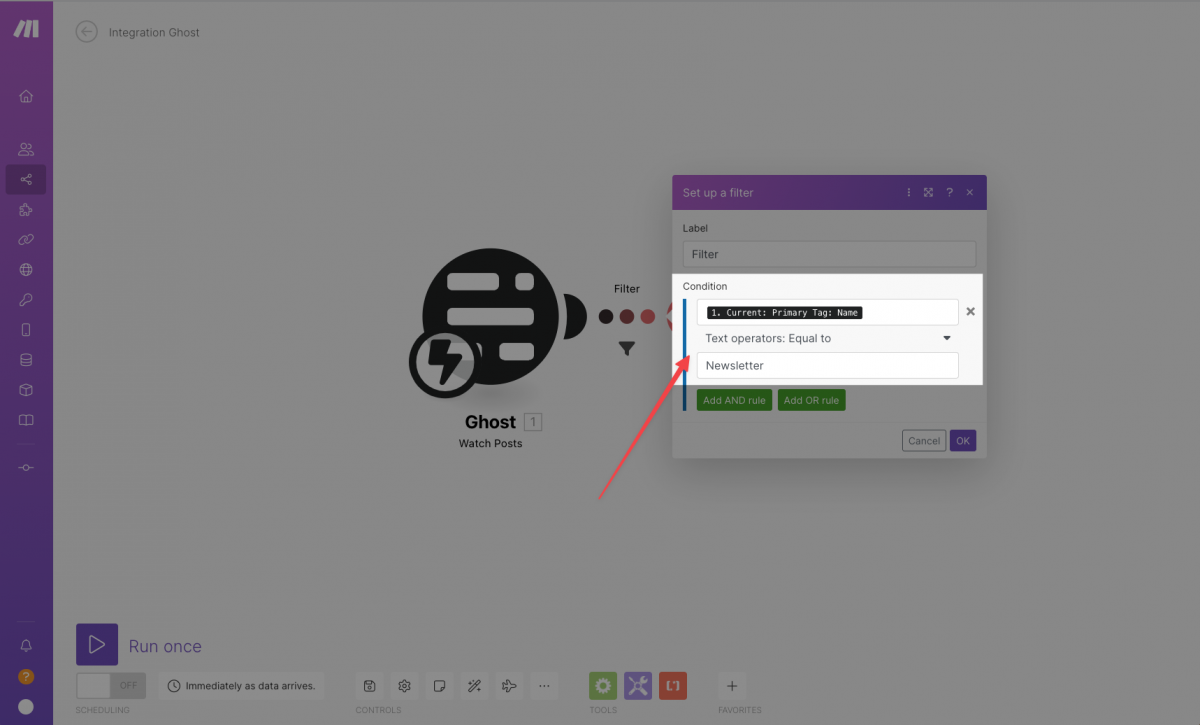
Want to use a different tag? No problem. Simply click on the filter icon in the middle. This opens the filter settings. If you're just changing the tag, replace "Newsletter" with your desired tag name.
This filter ensures that only the content you want is turned into a draft newsletter in ConvertKit. So, pick a tag that makes it easy for you to decide what becomes a newsletter and what doesn't.
Setting Up Your ConvertKit Credentials in Make.com
Now, let's give make.com the "key" to ConvertKit.
Click on ConvertKit Integration
On the right side of the make.com scenario, you'll find the ConvertKit integration icon. Click on it.
Enter your API Secret
All you need here is the API secret you fetched from your ConvertKit dashboard earlier. Put that in.
Ignore Additional Settings
After you input the API secret, make.com will show you a slew of other settings. No need to worry – everything's preset for you. But if you're ever curious about what those settings mean, you can always check out ConvertKit's API documentation for a detailed breakdown.
Putting It All Together: Your Final Guide
Well done! You've bridged your Ghost blog and ConvertKit using make.com. Now, your selected blog posts can automatically turn into ConvertKit newsletters. Let's test and finalise the process:
Test Drive
In make.com, click the "Run once" button at the bottom left. Head to your Ghost blog and create a new post, ensuring you use the right primary tag.
Publish the post. Over in make.com, you should see some activity. Everything should be green, signalling all is good. If not, there might be an issue with the connection, perhaps due to incorrect credentials.
See the Magic in ConvertKit
Go to your ConvertKit dashboard. Navigate to "Grow -> Broadcasts". There, the post you just published should be waiting as a draft. Exciting, right?
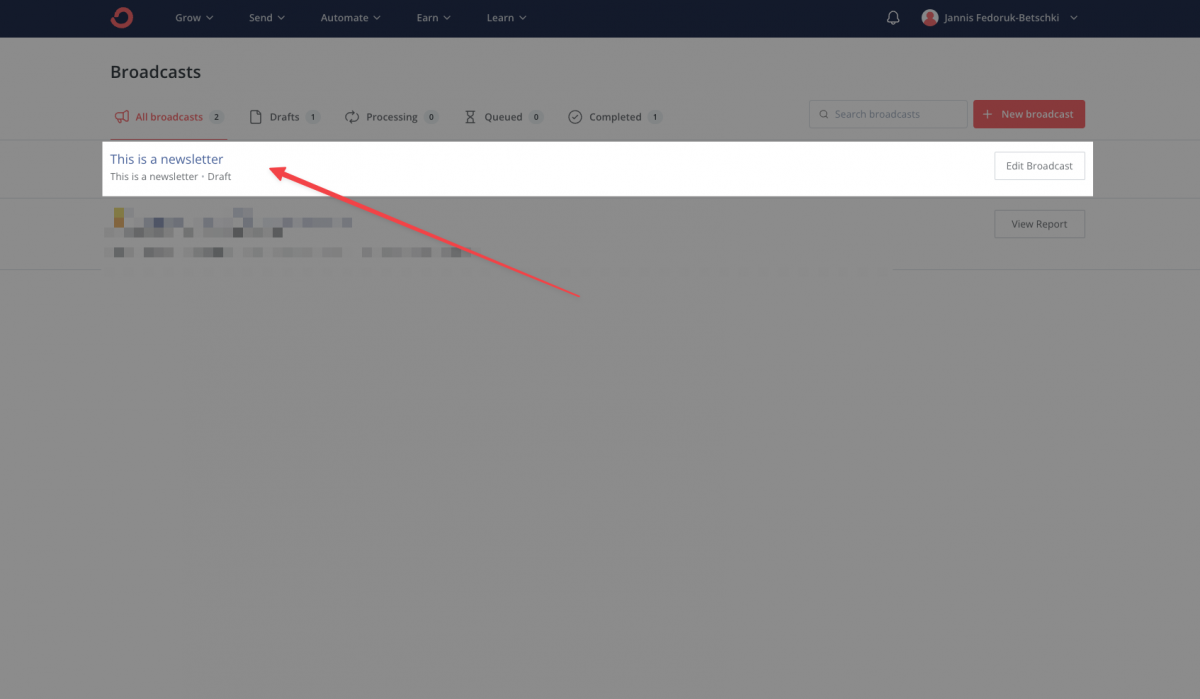
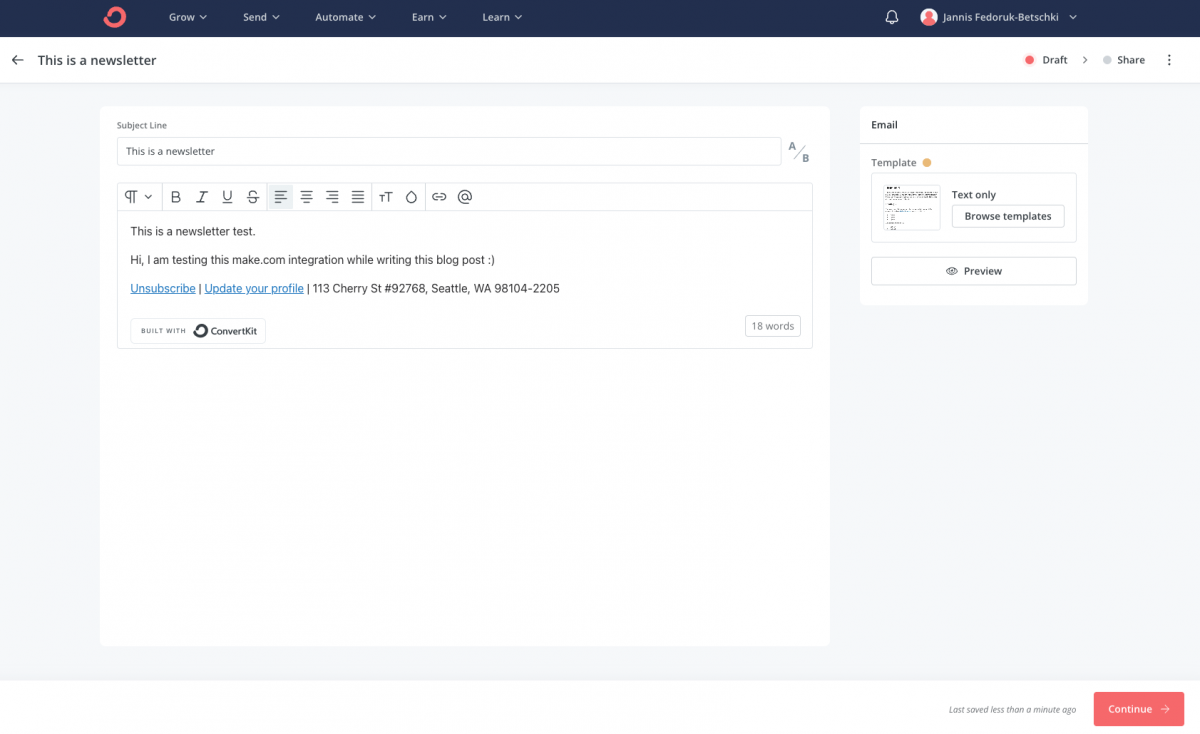
Want to make changes? Click "Edit Broadcast". Here, you can tweak the content, choose the audience, set a delivery time, and more.
Launch Your Automation:
Back in make.com, ensure the schedule setting is on "immediately as data arrives". This ensures a swift transfer of your blog post to ConvertKit.
Spot the switch at the bottom left? Give it a flip to set everything in motion.
Your tech setup is now live. Each time you tag and publish a post in Ghost, it's ready and waiting as a draft newsletter in ConvertKit. Publishing made efficient and easy!
Final thoughts from my side
While the integration we've set up streamlines the process, it's not without its limitations:
Lack of Direct Feedback
If you're familiar with Ghost's built-in newsletter feature, you'll observe an absence of direct feedback. Specifically, the analytics and stats that Ghost offers aren't mirrored in this setup.
Yes, you have those in ConvertKit, but if your goal is to have everything in one dashboard, this won't work with this automation.
Who is it Best For?
This integration is crafted with people who are already using ConvertKit in mind. If you've been using ConvertKit for a while, this setup allows you to seamlessly incorporate it with your Ghost blog.
However, if you're launching a new Ghost blog and haven't yet picked an email service, you might want to consider Ghost's native email feature. It's integrated and straightforward.